Showing posts with label DIY wedding. Show all posts

Tuesday, 8 July 2014

Kid Friendly Weddings


Kids at weddings. I know some people say no to that, but we love our friends kids, and we wanted a casual fun day. So kids were a must. But how to entertain them?

Here is how we did it:

Gift Bags - my sister gave me this idea.
So she was super organised, and made paper bags with decorations.
I wasn't really organised like that, but I bought some cute gift bags and filled them with toys, candy and goodies to keep the kids busy. It was a neat way to distract them, and to take something fun home with them.


Kids Table - this was so cool.
We laid sheets of newsprint over the table. Then we had big bright plastic cups and plates for all the kids to eat from. We had baskets of crayons and felts. Pots of playdoh. Stickers and stamps. It was so cool, I kind of wanted to be at the table.

Mushroom pop up Tent -
This was a cute, cheap way to provide shelter and a hidey hole for the kids. It was a pop up tent I got off Ebay. So cute.

Foosball table -
This entertained the kids of all ages. And was great during the cocktail hour.

Photobooth -
Everybody loved our photobooth - but those kids LOVED it. They literally got tens of photos each. And they did a good job at rocking all those props we set out!


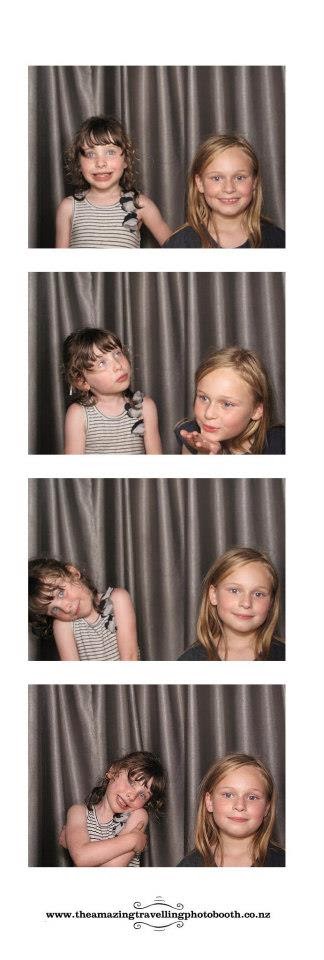


However, you know those Mastercard ads, this is kind of how the rest of it went:
Gift bags $75, Kids fun table $50, Pop up tent $20, kids spending an hour trying to catch a sheep in the field next door - priceless.

Haha, the main thing is, the kids has a super fun day, and that made us happy. Yay.

Oh, and the candy bar. Yep, they loved that!


And don't forget about the Mamas -
 We had some pregnant ladies and friends with wee ones. So we had a room where ladies could breast feed, or change bubs. It was nice to provide a little space for everyone to be comfortable.

Tuesday, 30 July 2013

DIY cupcake toppers


Here is a cute wee project that I did one evening in preparation for our wedding. Instead of a wedding cake, we had cupcakes, home baked cakes and like, the best candy bar ever. So for our cupcakes, I wanted a cute way to decorate. I also wanted to tie in the button theme that somehow spun itself into the day.
Here is what I did:


Cut a triangle flag out of construction paper. I got this stuff at a dollar store in Australia. Any kind of paper would work. Even washi tape would work too.

I measured out how big I wanted the flag to be relative to the toothpicks. I cut LOTS of triangles!

And then folded them all in half. I made half of the flags white and half blue.


I lined the inner edge of the flags with double sided tape, and then folded each flag around a tooth pick.


I then glued a matching button onto the middle of each flag using a hot glue gun. I used buttons that were random but all a similar color.


Our yummo cupcakes!

You could make these personalized for a party, pink or blue for a baby shower, or glue cool vintage buttons onto the flag for a retro look. Washi tape would be super cute if you wrapped it around a tooth pick and then cut out a little wedge for a flag!If you wanted to take it to another level of cuteness, what about using a resin cabochon on each flag!


Here are how the cupcakes looked on our candy bar!


Wednesday, 26 June 2013

Adding a comfy touch to your wedding

One of the aspects of our wedding that we got the most compliments on was one of the simplest things - comfort!

We wanted everyone to be relaxed and comfy all evening, so we set up a lot of "mini lounges" for people to hang out in.

On the lawn near the marquee we had a series of arm chairs, couches and sofas set up. They were arranged around coffee tables so that people could lounge and chill out in the afternoon sun. The coffee tables were all set out on vintage rugs so each area looked like a lounge or separate seating area.


We placed pillows and cushions all along the stairs for extra seating arrangements.

Although we had a beautiful, sunny day, it got chilly at night time. We had vintage suitcases around the lawn filled with afghans and woollen blankets for people to throw over themselves. This was vErY popular! So many people used them - I was quite delighted to see one of my baby blankets around Robs grandfathers shoulders. Big smile.


The best part was buying all the mismatched furniture from second hand stores, Trade Me and Amazon. I had a ball buying cushions and cushion covers and then stuffing them with pillow inners. Mum and I scoured Etsy, Trade me, second hand stores, church galas, and school fairs to get all the blankets. Plus some of our old ones were used - including the baby blanket I mentioned! 


At the end of the night, it got even better! All our friends who stayed late chatting and drinking and listening to music gathered the chairs in a big group. We bundled into blankets and dove into the left over food and the candy bar. What an amazing end to a wedding. 


Our day was as much about the two of us as it was about our family and friends. We wanted them to be super happy and comfortable and to have a great time. We wanted to share our love and make them a part of the special thing we have. 

We were so happy to hear that they did.


x


 Photography:
Areta Arcus

Tuesday, 25 June 2013

DIY Wedding Table Decor

Here is a breakdown of how we decorated our tables for the wedding.


My Mum and I collected blue and clear glass bottles ranging in size and shape. There were retro soda bottles, medicine bottles, wine bottles, tall bottles, short bottles, milk bottles, European soda bottles, old bottles, new bottles.. all sorts of bottles. We were going to have white hydrangeas in the bottles, but in the end we decided we liked the bottles by themselves. We really liked the blue and clear glass combinations.. And, we randomly found a bag of bright red hearts on sticks at the dollar store. I had grabbed them randomly, and decided to throw them in the glass bottles. They made such a pretty contrast to the blue and white. Especially since I was wearing blue, white with bright red lipstick.


We had tea lights candles in glass jars and tea cups. We randomly collected them over a couple of years and then had them all over the tables. Another thing we collected were old lace and embroidered doilies. All the candles were on the doilies along the centre of the table.


The name tags took me a long while, but it was totally worth it. I stamped out all the individual letters with a typewrite font stamp and then added a stamp of some buttons to go with the theme. I used manila tags that I bought off of ebay. Blue and white twine tied everything together with the napkins.


I have blogged how I made my table numbers at an earlier date. Take a look at the post if you wanna see - I think they turned out so well!

Bridesmaid dresses with a difference - convertible and cute!


Any brides out there will agree that one of the hardest things to plan for the wedding, its the bridemaids attire.. I spent sooo long looking at colours and lengths and styles that I nearly went crazy. My biggest requirement was that my beautiful friends ALL felt comfortable, gorgeous and unique.

I considered just asking them to buy a dress of their choice in a certain colour, but my husband is pretty OCD and wanted them to be somewhat matching.

Then I considered making these dresses that I found online...

I decided that convertible/infinity dresses were the choice for me, after I showed two of the ladies and they squealed with delight. The next step was to find where to buy them from. They are trending in weddings at the moment and there are a growing number of stockists.

In the end, after much research I found this Etsy store,

I had heard great things about the dresses and the store owner so I decide to take the plunge..


I ordered five of these dresses,
and customised the lengths, waists and bust sizing to fit my ladies.

The dresses arrived on time, each in a beautiful individual linen package, with a sea horse printed on it.

The dresses were ABSOLUTELY perfect. I couldn't believe how relieved I was after all that searching! Everyone loved their dresses, and they will be worn again to balls and formals because you can make them unique every time. I was jealous I didn't have one!!

The day of the wedding was super fun, we spent ages stylising each ladies dress to suit them exactly. It is crazy how good it looked. My sister was 8 months pregnant and the dress sat beautifully on her baby bump. It suited one lady who was taller and another who was shorter. Different body shapes and lengths - they all looked great!


The dress can be adjusted to change the front, the back, the way the strap ties, the neck line, and even the length of the dress. There are soo many tutorials on you tube which show over 100 different ways to tie the dress!


I completely recommend these dresses to anyone who wants a unique look for each bridesmaid, while still retaining the traditional "matching dress" look. The best thing for me, is that the girls all loved the dresses. After all, you want your best friends to be just as happy as you on your big day!!


Photos: Carey Conn Photography http://careyconn.co.nz/
Dresses: http://www.etsy.com/shop/CoralieBeatrix?ref=seller_info